There’s a very good reason that Abraham Lincoln subsequently didn’t say, “. government from the corporations, through the corporations, but for the people.” First of all, an organization is nothing more than a legitimate entity empowered to earn money. That could ever have a similar legal rights as a person (whether you think within the soul) doesn’t seem possible. Next, by its nature, an organization enables for dishonest activity to visit unpunished. We’re scrambling to make sure individuals are attributed for the things they’re doing within the company’s name. It’s still simpler to state that Microsoft is definitely an immoral monopoly, instead of point fingers at specific individuals (I wouldn’t wish to be Bill in the Pearly Gates). The prior is inspired because “Rollerball” happens inside a world where corporations have replaced government. It’s a bad, awful factor. The Balance of Legal rights claims that people aren’t granted freedoms, but rather ask them to automatically. Pointless to state, a business rewards program isn’t the same.
Okay, stop panicking. I’m from the soapbox on and on to examine a film in regards to a violent, make believe sport. You know what though? My little rant is germane towards the film.
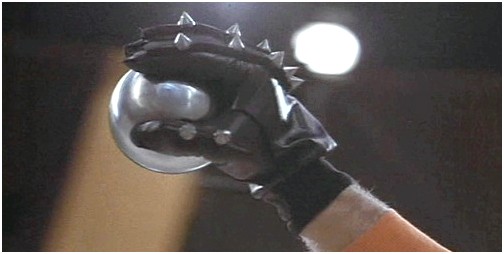
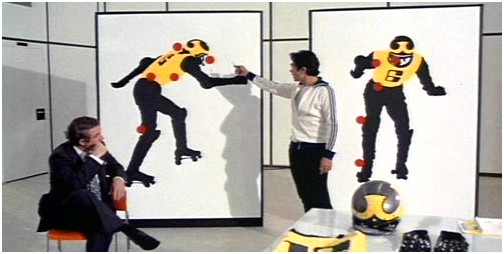
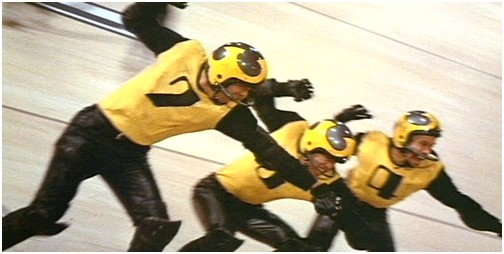
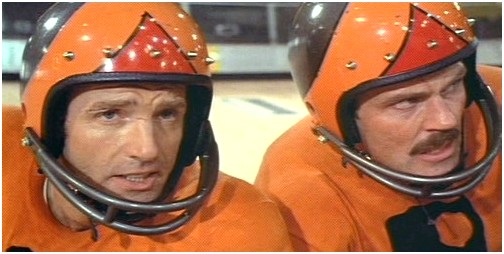
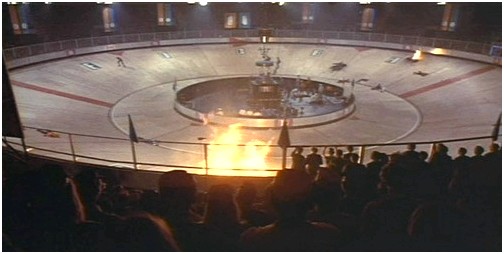
“Rollerball” is really a game involving a round track, roller skates, motorcycles, along with a polished shot (as with a sizable metal ball). The mechanics are quite simple. The ball is fired along a track and selected up with a catcher, after that it should be put into the aim. I believe the possessing team may be needed to create a minumum of one lap before trying to score, but can’t be certain. Striking one another is permitted, but very violent attacks are punished with three minutes within the field. Try taking some big guys, add spiked gauntlets, bikes, speed, along with a heavy ball. What you’ll get may be the recipe for serious injuries.
The very first game we watch will a good job of conveying all of this. Additionally, it establishes Jonathan because the sport’s hero. He plays fairly and it is the item of adulation for rollerball fans around the world. Therefore, Jonathan is surprised when retirement is recommended by Bartholomew. Greater than recommended, he’s told to retire in the sport. An approaching television special, documenting the player’s career, continues to be selected because the perfect here we are at him to announce his retirement. The coercion doesn’t sit perfectly with Jonathan he’s told to take a few some time and consider it.
The executives running the planet want Jonathan to depart the game for any single reason: he’s a hero. By surviving and rising over the other players, he’s be important compared to game itself. That can’t be permitted. The employees must begin to see the futility of person glory. The manager heads want players to die, as evidenced by rollerball’s insufficient a farm league.
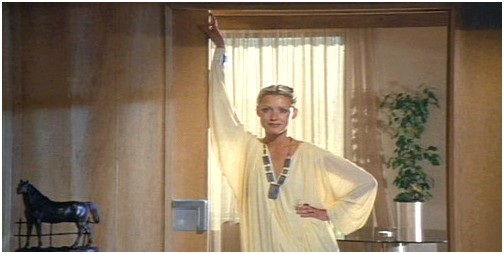
Several scenes are incorporated to show a few of the shocking alterations in society. Women are nothing more than rewards provided to effective managers (or good rollerball players). The sporadic utilization of a effective narcotic is prevalent, apparently overlooked like a harmless evil. Lastly, books really are a factor of history. All the world’s understanding is stored on computers and the organization decides what ought to be readily available for retrieval.
Hunkering lower just like a poked toad, Jonathan will not browse the retirement announcement which was ready for him. The problem causes no little bit of grief for Bartholomew, particularly when a sizable party (for company bigwigs) is located to savor the tv special. Because the entertainment winds lower, some disillusioned visitors required to blasting trees having a hand gun. It didn’t shoot lead. Heck, I don’t understand what it fired. I simply realize that the trees burst into flame.
The rebellious captain from the Houston team insists ongoing to Tokyo, japan for that playoff game. The organization, determined as always to rid themselves of Jonathan, changes the guidelines. The sport is performed without penalties and also the situation rapidly will get beyond control. Large figures of players are hurt or wiped out, including Moonpie. His attack was nothing more than an execution. Knocked senseless, the large American (oops, archaic term within this movie) takes place by two Tokyo, japan players while another punches him in the bottom of the skull. Jonathan survives the sport and the team wins, but Moonpie will expend the remainder of his days hooked to some respirator and pooping right into a bag.
Resolving to visit Geneva (the earth’s last library, where all of the books are stored) and discover some solutions, Jonathan only finds more evidence the world is wrong. The mind librarian is madder than the usual hatter and also the computer can also be twisted. In some way they lost the whole 13th Century! I possibly could make a variety of Google jokes, however the computer’s architecture is most likely responsible. The darn factor is stuffed with ginger root ale.
Back in your own home, the rollerball legend includes a surprise awaiting him: Ella. Following a short go back to the great past, he discovers why she really returned. Ella doesn’t love Jonathan, but she does what the organization informs her to. Understandably, this will make him just a little angry. It’s reliable advice that Jonathan is performed pining for that b***h.
The final game of year is against New You are able to. The guidelines are altered again, because the game is going to be performed without any time period limit. A score to achieve isn’t given either, so it ought to be apparent that we’re watching modern Roman gladiators. The track becomes the website of unrestricted warfare Jonathan even maims (possibly kills) one New You are able to player directly while watching executive box. Bartholomew will get the content. The finish from the movie has our hero, bloodied and torn, but nonetheless standing. He skates around a track full of physiques. There’s silence, then your rising chant from the crowd.
“Jonathan, Jonathan, Jonathan, Jonathan, JONATHAN, JONATHAN! JONATHAN! JONATHAN!”
Several us desired to review “Rollerball” and a few of their children – the illegitimate ones. I got lucky and came the initial. Listed here are another reviews for Rollerball-A-Thon:


> That [an organization] could ever have a similar legal rights
> as a person (whether you think within the
> soul) doesn’t seem possible.
You’d think so, but because of maniuplation of the court ruling within the 1880s, corporations are thought “persons” with regards to the Bill of Legal rights. Before, it had been a legal for corporations to give money to political parties.
Tzog is appropriate, It is at New You are able to once they attempted to limit a company’s profits to sixPercent and the organization sued.
To The Film. I just read rapid story, “Rollerball Murder” having seen the show. It had been mostly concerning the “sport” and incorporated a person caller a “Runner” who, well, RAN coupled with a Lacross-type factor to scoop in the ball. As the movie has a number of that dull sixtys message stuff, it expanded the storyline good enough.
Some point that will get missed between your 1975 edition and also the 2002 edition would be that the 2002 version winds up BEING exactly what the 1975 version was warning about. The irony of the is immeasurable.
Sadly, those who think the social commentary within the 1975 version takes away from the experience are exactly the type of individuals who would (and really should, I guess) live on the planet protrayed may be the movie.
That is very, very sad.
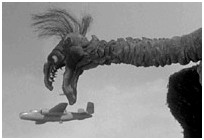
The Enormous Claw –
Earth is visited with a GIANT ANTIMATTER SPACE BUZZARD! Gawk in the amazingly bad bird puppet, or chuckle within the silly dialog. This is among the finest b-movies available.
Lesson Learned:
- Osmosis: os·mo·sis (oz-mo’sis, os-) n., 1. Whenever a bird eats something.
Source: www.badmovies.org