FW Markers can br filled and re-full of an entire number of water-based media. Whichever medium you decide to fill your marker with the filling and cleaning processes will stay the same. Among the distinguishing options that come with these markers is they could be refilled again and again, with inks and paints of numerous different colours. If you opt to refill a marker having a different colour then it’s vital the marker is correctly cleaned to avoid the mix-contamination of colors.
We’ve produced helpful step-by-step guides for filling and cleaning your markers, which means you obtain the best performance possible!

Clogging Your Gutters Marker
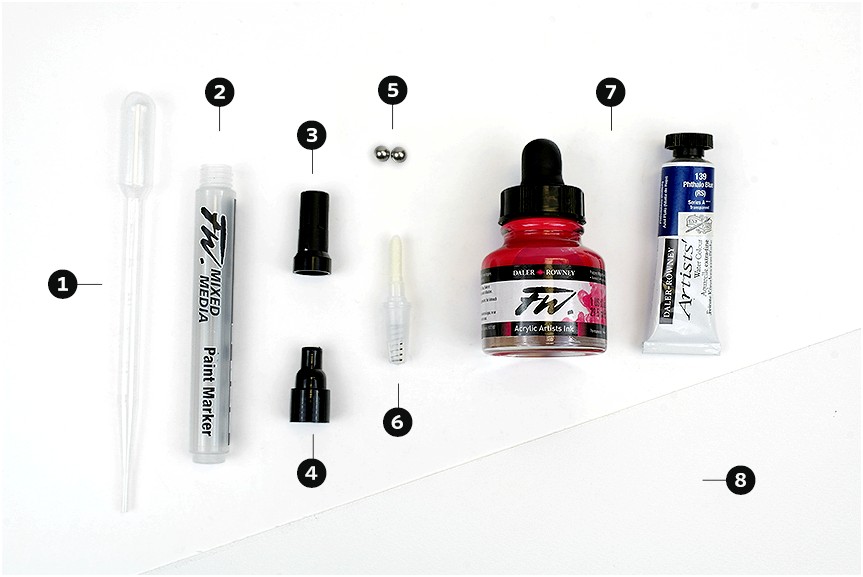
- A pipette or dropper – To fill your marker with liquid media. Some inks may already have a dropper within the lid, otherwise a pipette may be used.
- A clear marker barrel – You’ll place your ink or paint into here later.
- Black marker cap – Keeps the marker safely airtight to avoid the end becoming dry.
- Black nib casing – This supports the nib in position.
- Two metal balls – They agitate a lot of it to make certain it’s free flowing and prepared to be used.
- Obvious plastic nib holder – The nib sits within this container. Whenever you arrived at altering your nibs it may be easily plucked came from here and become replaced.
- Ink or paint – Pick the medium that you want to fill your marker with, there are lots of choices available.
- A bit of scrap paper – make use of this to check your marker on to obtain the ink flowing.
Clogging your gutters marker is an extremely fast and simple process. To fill your marker either stick to the steps below, or visit a visual walkthrough within our video also incorporated below.
- First of all you have to take away the cap. When you take it off you will be able to rapidly and simply unscrew the nib casing. Take away the black casing and offer one for reds.
- When the casing continues to be removed you will see that the nib is in a small plastic holder. Lightly pull this plastic casing in the barrel from the marker. You will also spot the removable nib, which may also be replaced rapidly and simply.
- When you’re using the marker pen apart don’t lose the 2 metal balls contained inside the barrel! These balls are within the marker to agitate the liquid before use to make certain it’s correctly mixed.
- The barrel is now able to full of your selected media, an entire selection of paints and inks may be used. Most inks have a handy dropper within the lid, which can make this less untidy. If you’re mixing colour from diluted Busho or watercolour you might find a pipette helpful to transfer your paint out of your palette and in to the barrel.
- When the marker is full you are able to re-assemble the pen. Just place the nib holder in and screw around the nib casing.
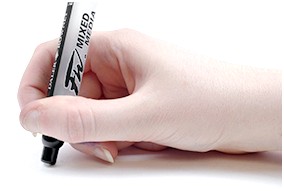
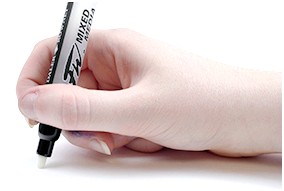
- You’ll now have to draw the color with the marker tip. To get this done contain the marker inside your hands and rest the nib on the scrap sheet of paper on the hard surface. Press lower using the marker multiple occasions to produce a pumping motion this motion will draw a lot of it in to the nib. When the nib is fully saturated you are able to stop.
- The marker has become available! Your markers could be stored with ink included just make certain the caps they fit on tighly to avoid the nibs from becoming dry. In case your markers will be in storage for some time you will notice that you have to provide them with a great shake before with them!
Cleaning Your Marker
FW Markers are perfect in that they’ll be utilized and refilled again and again. For those who have consumed the liquid inside your pen, or possibly simply want a big change in the colour that you are using, using the pen apart and cleaning it couldn’t be simpler! Just follow these simple instructions:
- If you’re altering the items in your marker it will have to be completely cleaned first. To start you have to disassemble the marker while you did when you initially filled it, by unscrewing the nib casing and detaching the nib holder.
- If you work with a sink to wash your markers it’s wise to place the connect so you don’t loose the small parts.
- Make certain to wash every individual area of the marker completely any small quantities of residual ink could taint the color you refill your pen with. For those who have were built with a strong colour within the marker you may want to soak the various components to make certain the color rinses out.
- Fill the barrel with water, reassemble the marker and provide it a great shake. Then go ahead and take marker apart again and rise out.
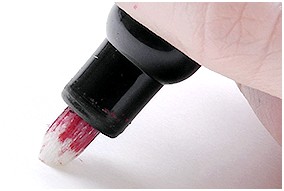
- Then you will eliminate the marker using water. To get this done refill the marker with water, turn the marker upside-lower and put on the hard surface. You’ll then have to press the marker up and lower to attract water in to the nib. Draw using the marker to produce a lot of water with the tip.
- Continue drawing using the marker to purge the water until it runs obvious. With more powerful colours this can take more time. Some quite strong colours leaves a really pale residue, but it shouldn’t hinder the shades you refill your pen with.
Source: www.artsupplies.co.uk